Flour paste resist
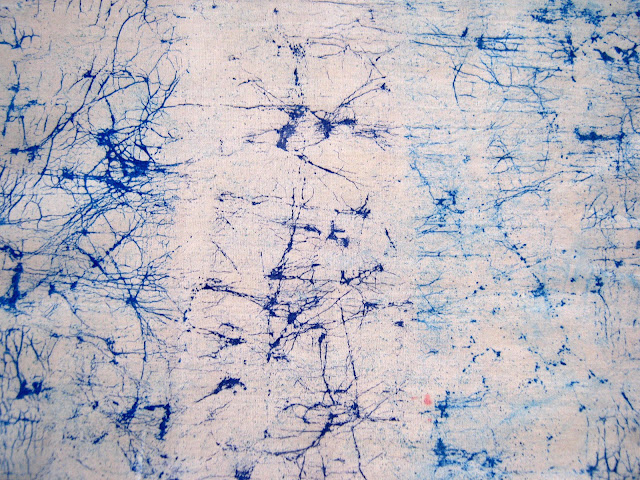
A friend wanted a "crackled" piece of fabric which is why I experimented with the piece shown in "fabric friday."
This is how it is done. There are no photos for the first few steps as frankly they are pretty boring to look at and honestly I forgot to take any!
Mix flour and water in a ratio of 1:1.
Stir it up, removing as many lumps as possible. Leave it to sit for a while so that it becomes nice and gloopy.
Spread it over fabric as evenly as possible. This is easier if you tape the fabric down on a board first.
I used an old credit card as a spreader.
Leave to dry.
Okay here comes the first photo.
The fabric curls up as it dries and looks like animal hide. This is now the time to put in the crackles, (more of which below).
Now you add the UNDILUTED paint. This is one of those occasions when you don't want to be watering down the colour, as all that will serve to do is dissolve the flour.
Cover the surface of your fabric and allow to dry completely again.
Once dry, sit your fabric in water for about 20 minutes or so to allow the resist to come away from the fabric.
It is then a bit of a messy process while you rub the resist away from the fabric under a running tap. Dry and press.
The way in which you crackle the fabric makes a difference.
From the left, the first one I forgot to crackle so got a very fine line,
Middle piece was crushed up in my fist,
Third one was kind of rolled up in the one direction.
I used Pebeo Setacolor paint as usual, which states that it has to be fixed by heat, but I couldn't do that before I had washed out the flour, so I was half expecting all the colour to wash away as well, but as you can see it was okay.
The kind of paint you use will have some bearing as you can see from my first blue piece, the section on the right was a different paint and that dissolved a bit into the fabric.
I like this effect, but you do wash alot of the paint down the sink! At times though it might be just the effect that you want, and I already have an idea in mind. If you have a go I would love to see the results.


I love the different effects you get depending on how you manipulate the crackle.
ReplyDeleteI may have to try your first method because I have a birch tree in mind...and the last would make lovely pine bark...
:)
I love all the different effects but really love the one you got by rolling the fabric. Thanks for the explanation even if I never do it myself I shall watch fascinated by the sidelines.
ReplyDeleteIt came out really nice and easy enough to do. The ones I got, she explained the process, should have written it down, lol. But they set theirs out in the sun to dry and it is a 3 step or more process, so not sure what they do.
ReplyDeleteDebbie
Great!! and SO simple , wow!
ReplyDeleteThank you for the tutorial , it's a gold worth one.
Keep going, I'd love to see more great ideas here!
Love all three of these crackle finishes.
ReplyDelete